Logging In
Either just before your scheduled training or after an account request, you will receive a Drupal account activation email from [email protected]. It will include you username and a special one-time login to access your account for the first time.
Follow the link in the email to login. You will be directed to your user page where you must re-set your password. Remember to click "Save" or your password will not be changed.
In the future, you can login to the manage your site at http://your-site-url/user/login or http://your-site-url/user/login.
Your Account
Note that your account belongs to you, and only you. Make your password secure and never share with others. If you need to give someone access to edit the site, request a new account.
If your site is live, all edits must be made on the live site. We will block your account on the development site to avoid confusion.
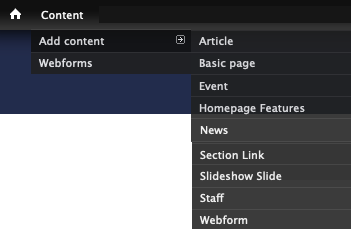
To add content, use the admin menu: Content -> Add Content -> Select a content type.
Complete the form fields to build your page or event, etc.
IMPORTANT: the WYSIWYG editor/file upload works best if using Chrome, Firefox and Safari. Avoid Internet Explorer if you are adding images and/or files to your website.
To add images in the WYSIWYG editor, click the "Image" button. Next, click the blue "Browse Server" button.
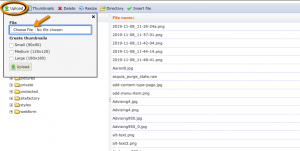
Either pick an existing image in the right column or upload one using the "Upload" button. To upload an image, click the "Upload" button and "Browse..." to select a file from your computer.
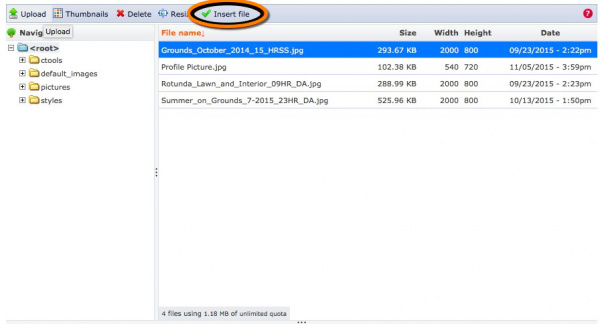
Once you have selected the file, click "Upload" to finish uploading the image. Now your image should be selected in the right column. Click "Insert file" to choose your image.
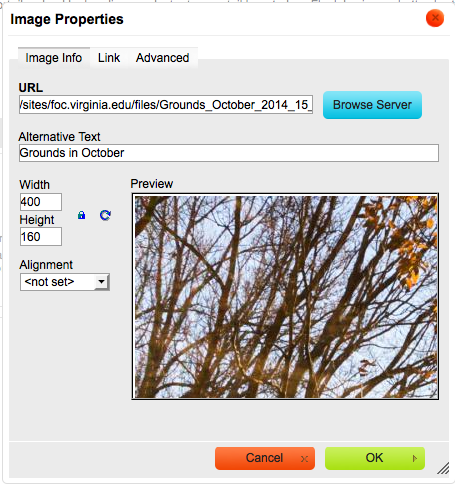
IMPORTANT: In the "Image Properties" window, supply "Alternative Text" to make your image meet accessibility requirements. This should be a description of the image. If the image is purely aesthetic and does not convey meaning enter empty quotes (" ") and screen readers will ignore it.
If the image is too large, you can use the "Width" and "Height" fields to adjust accordingly. The "Alignment" field will float your image left or right and apply text-wrap.
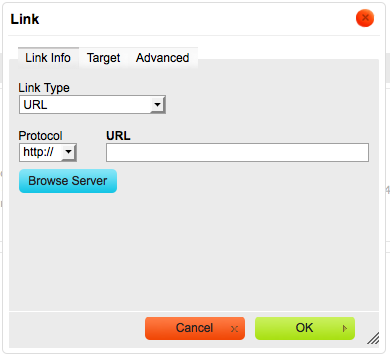
To add links in the WYSIWYG editor, highlight the text or select the image you'd like to make a link and click the link button.
The "Link Type" field allows you to select whether the link should direct to a "URL", an anchor in the text (jump to a pre-defined area in the text), or an email. Most of the time you will use the "URL" link type.
When linking to an external website, paste or type a full link into the "URL" field.
To link to another page on your website, use a relative URL. A relative URLs means the part of the URL that comes after your home page. For example, if you are adding a link on the page "http://www.virginia.edu/example-page" to "http://www.virginia.edu/another-example", enter "another-example" rather than the full URL. This is important because it ensures your site will work in any of our environments where the home page URL varies. It is especially important when you are first building your site in our DEV environment so that when the site goes live, the links are pointing to the live site and not the dev site.
IMPORTANT: the WYSIWYG editor/file upload works best if using Chrome, Firefox and Safari. Avoid Internet Explorer if you are adding images and/or files to your website.
To add links to files, highlight the text that will be the link to a file and click the link button.
Either pick an existing file in the right column or upload one using the "Upload" button. To upload an image, click the "Upload" button and "Browse..." to select a file from your computer.
Once you have selected the file, click "Upload" to finish uploading the image. Now your image should be selected in the right column. Click "Insert file" to choose your image.
IMPORTANT: In the "Image Properties" window, supply "Alternative Text" to make your image meet accessibility requirements. This should be a description of the image. If the image is purely aesthetic and does not convey meaning enter empty quotes (" ") and screen readers will ignore it.
If the image is too large, you can use the "Width" and "Height" fields to adjust accordingly. The "Alignment" field will float your image left or right and apply text-wrap.
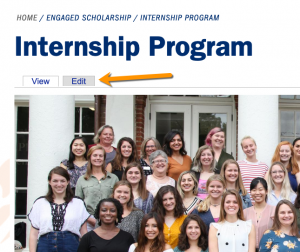
There several ways to access content on CACS-built websites, the Edit Tab, Edit Links, Gears, and the Content Overview page.
Edit Tab
The Edit tab is available on all pages and some other content types.
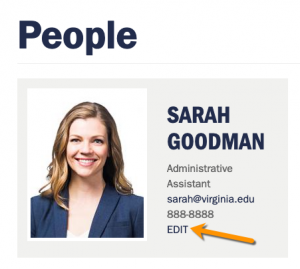
Edit Links
Many pieces of content have Edit links built in so that you only need to browse to the page with that item and click Edit.
Gears
Gears show in the upper right corner of content blocks. Hover around the area until it appears and select Configure block to edit.
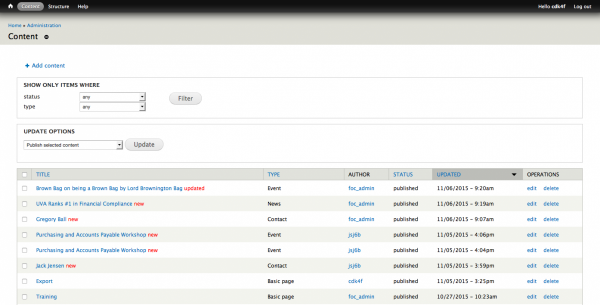
Using the Content overview page
The list of content may be filtered by content type and published status or sorted by Title, Type, Author, Status, and Updated date.
Some sites are configured to allow a search of content titles.
Add Page to Menu from Page Edit Screen
Add the page you are creating or editing to a menu by using the Menu Settings towards the bottom of the screen just before the Save button. Check "Provide a menu link" to include it in the menu. The link title defaults to the page title; however, you may change it here. Choose the parent item if the current page should go under another page in the menu (e.g. People under About).
Re-order, Add, or Remove Menu Items
Go to Structure -> Menus -> Main Menu
